This article will cover the sections you will encounter when uploading files in the project resource section, the available fields in each section, and what they mean.
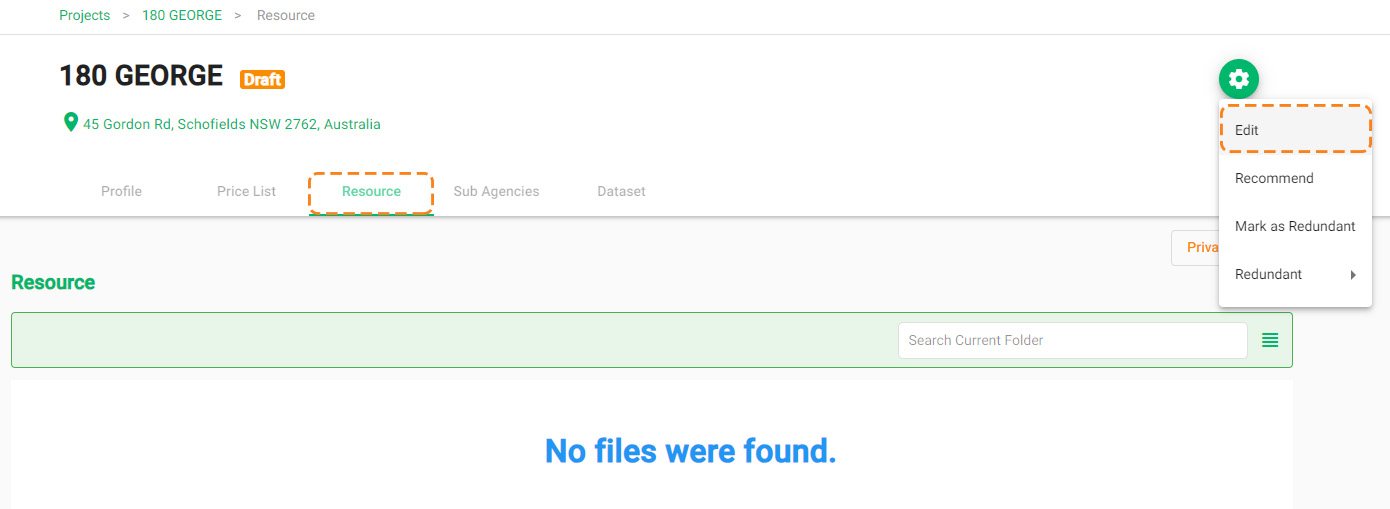
Go to the property resource page, click on the setting button on the top right, then select “edit” to enter into edit mode.

Click on Create Folder to create a custom folder, and give it a name.


Click on Upload to upload files from your local device.
Upload Folder:
- This option allows you to select an entire folder from your local device.
- When you upload a folder, it transfers the entire folder, including all of its contents (files and subfolders), to the project resource page.
- It maintains the folder as a single unit and doesn’t break down its contents into individual files and subfolders.
Upload Folder Content:
- This option allows you to select a specific folder on your local device.
- When you choose to upload the folder’s content, it transfers all the files and subfolders contained within that selected folder to the project resource page.
- It preserves the folder structure and hierarchy of the files within the selected folder.
Upload Files:
- This action involves selecting one or more individual files from your local device.
- When you choose to upload files, you can select and transfer specific files without the need to select an entire folder.
- It allows you to upload files individually, making it suitable for situations where you want to transfer only specific documents.

The resource you upload is, by default, stored in the public space and accessible to company members and channel companies.
Private Folder
You can also upload files in private space by clicking on Private Folder.

The files in the private folder are only visible to company members.
Edit External Link

You can add external resource link (Link of Agent Portals, Dropbox Link, Google Drive Link, One Drive Link, etc.)

Exit Edit Mode

